 russ
russ静态文件托管
安装 nginx
- 本地安装
nginx的方式有很多种 - 我这里采用
docker pull nginx镜像到本地,然后基于这个镜像跑一个容器就可以了。
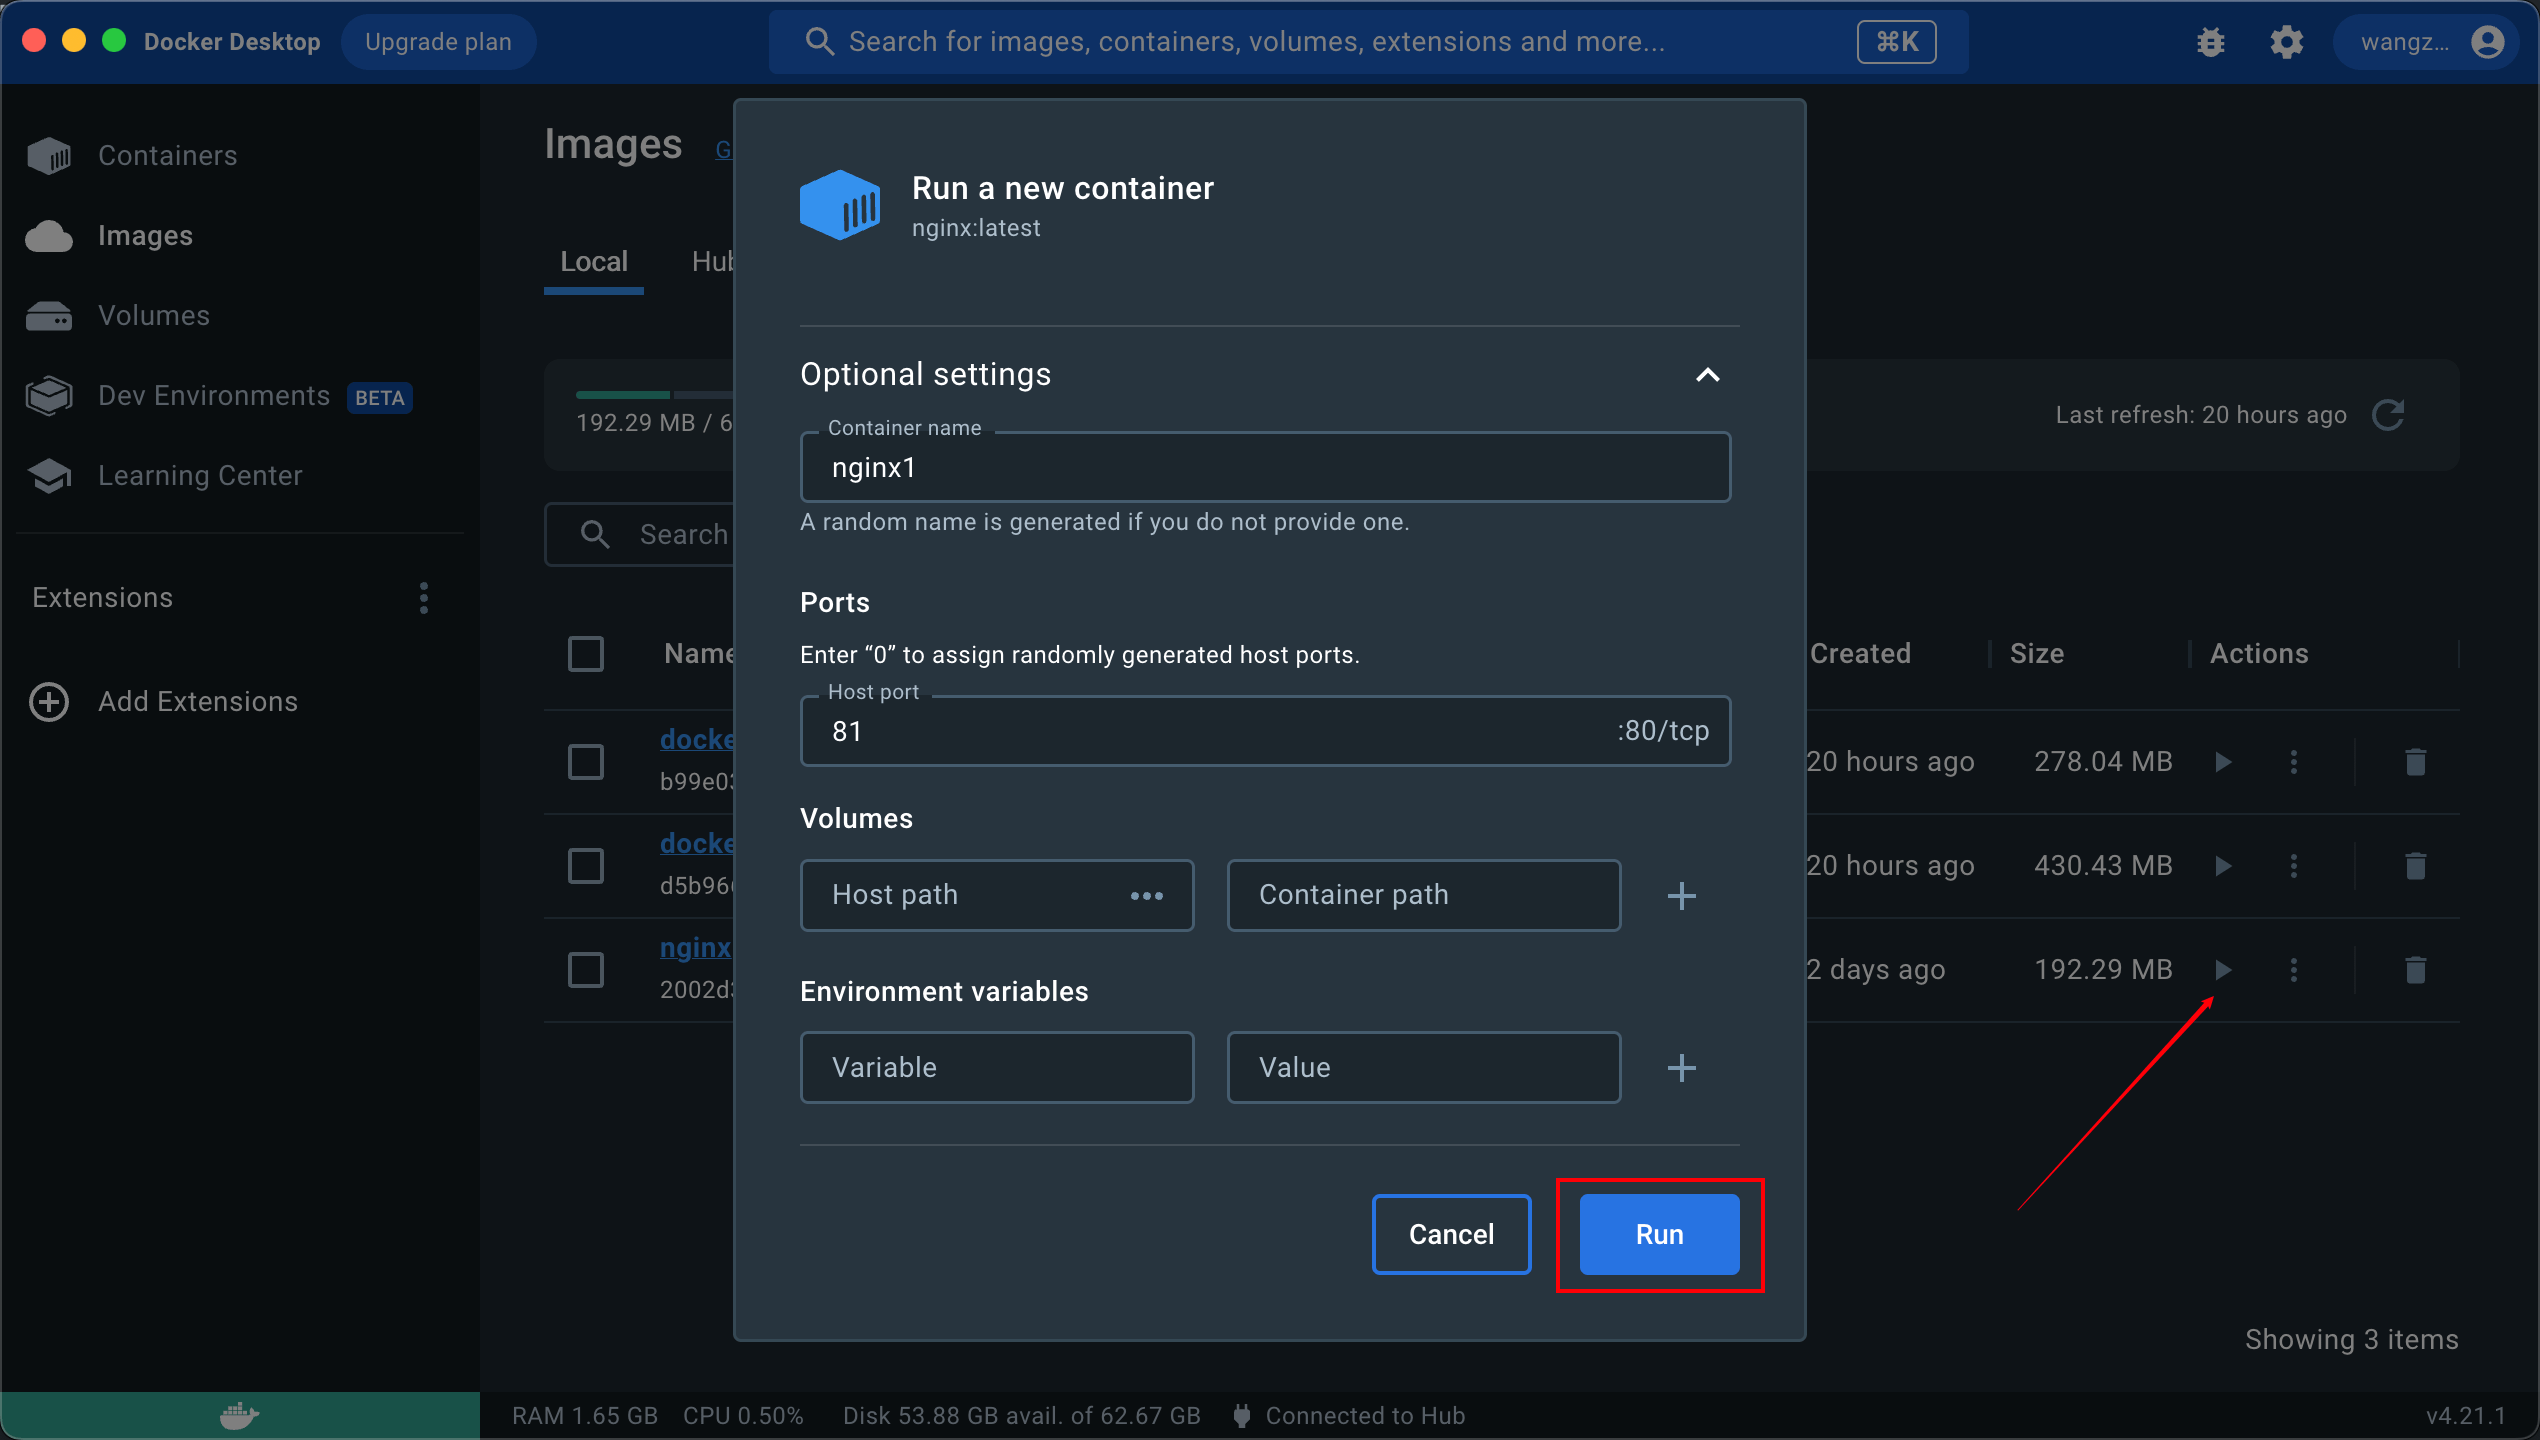
- 这里设置镜像名称
nginx1本机端口设置为81 - 打开浏览器访问
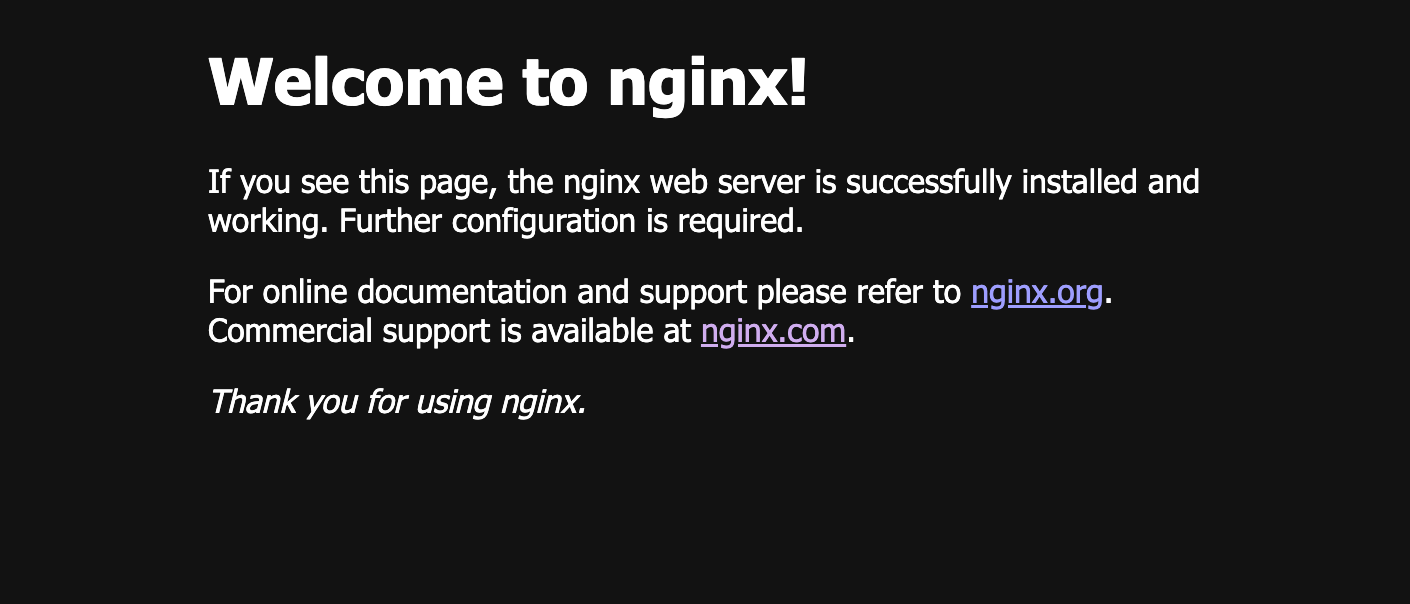
http://localhost:81/就能看到欢迎页面
nginx 的静态文件托管能力
现在的页面是默认的,我想用
nginx来托管我的一些静态html页面怎么做呢?首先我们要知道现在的配置文件和页面都存在哪里。
在
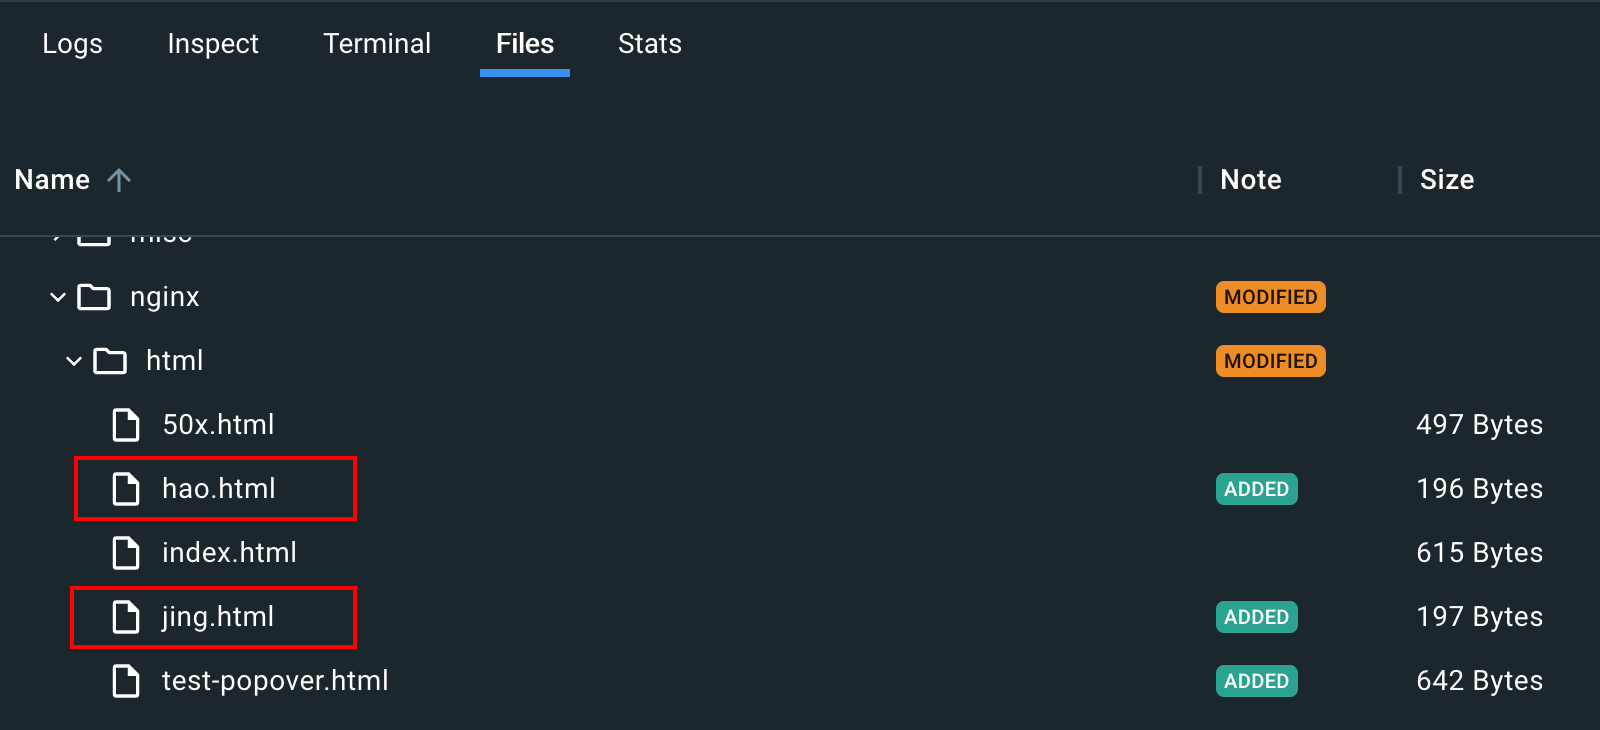
docker desktop的files面板可以看到容器内的文件
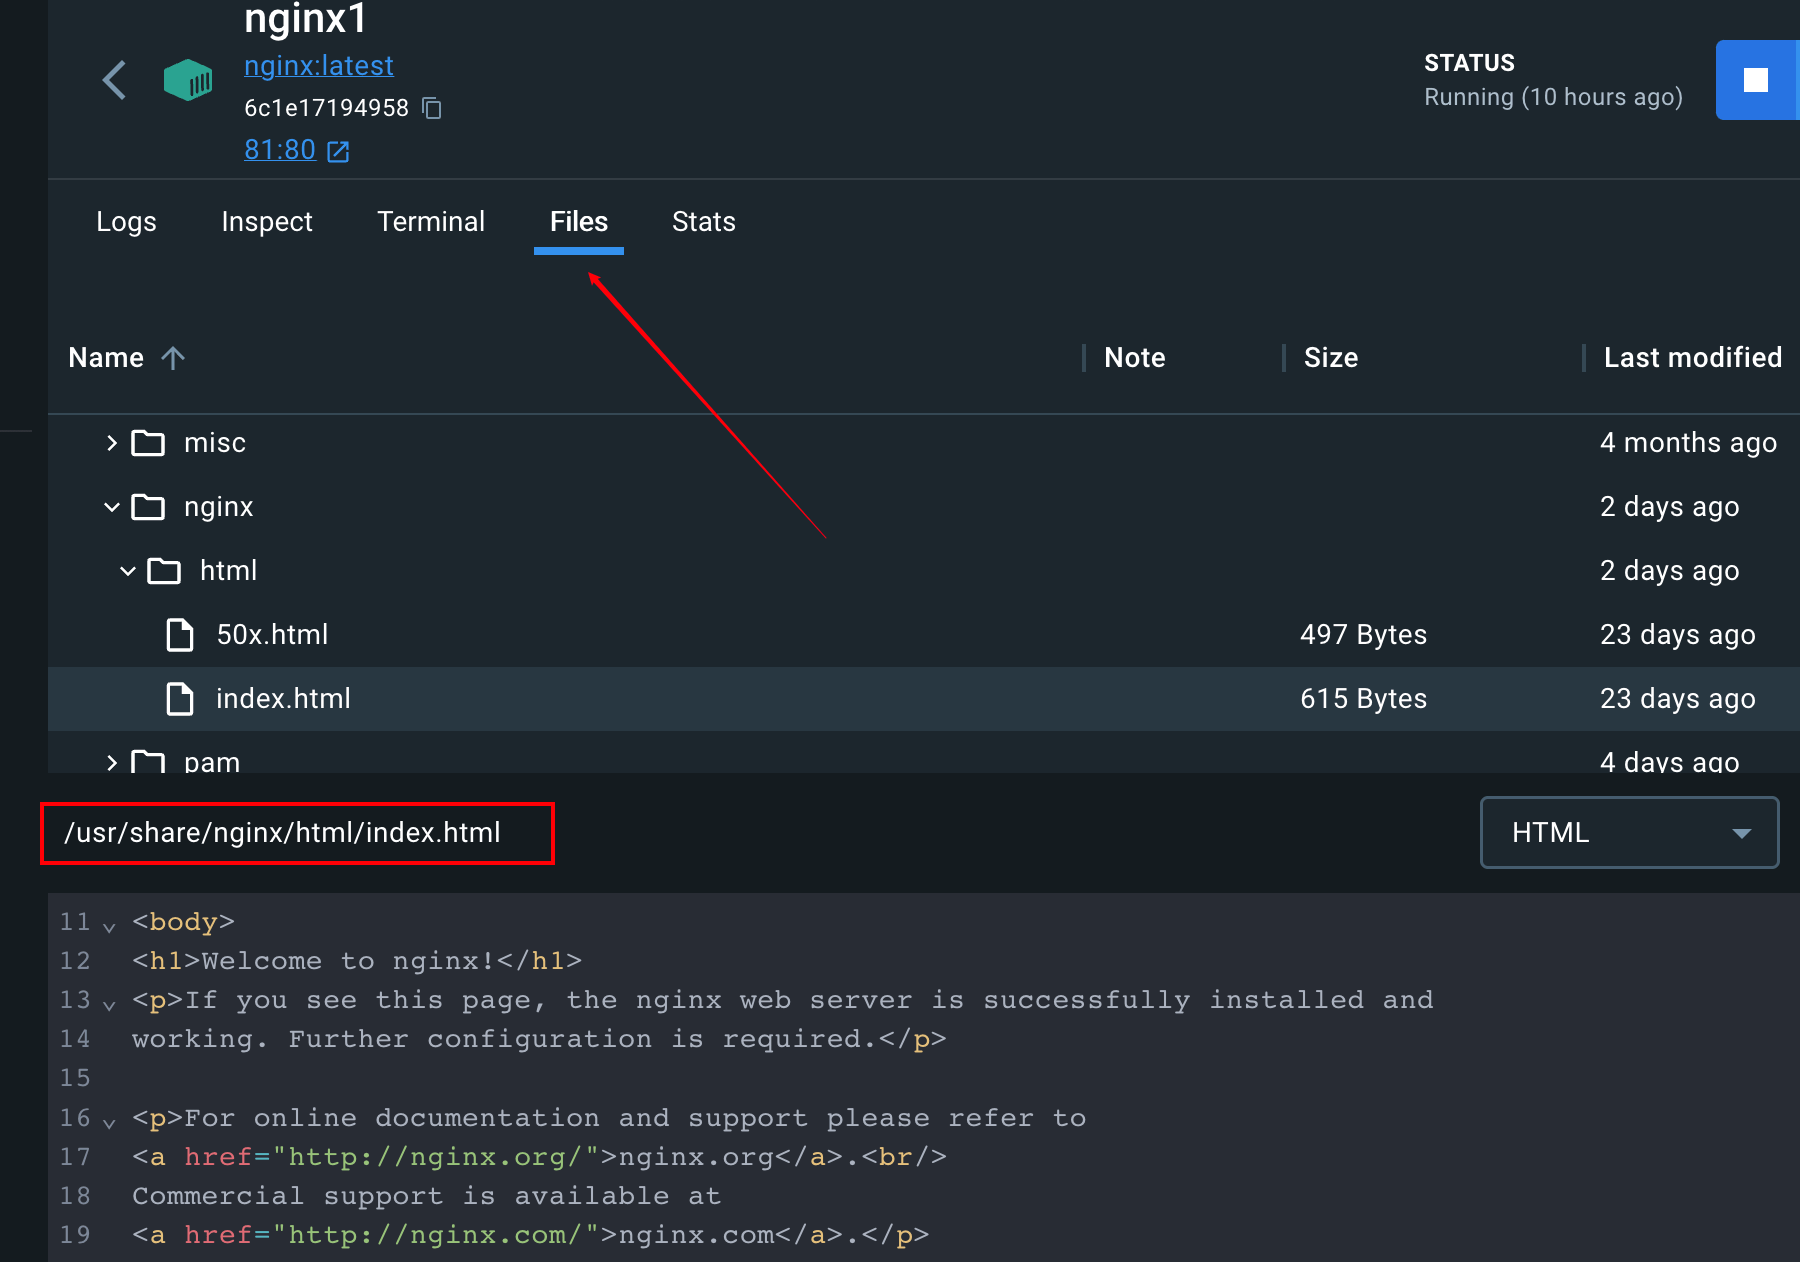
/usr/share/nginx/html/index.html这个文件内容和浏览器看到的一模一样这个目录就是保存静态文件的目录,那我们在这个目录下放我们自己的
html就行了。
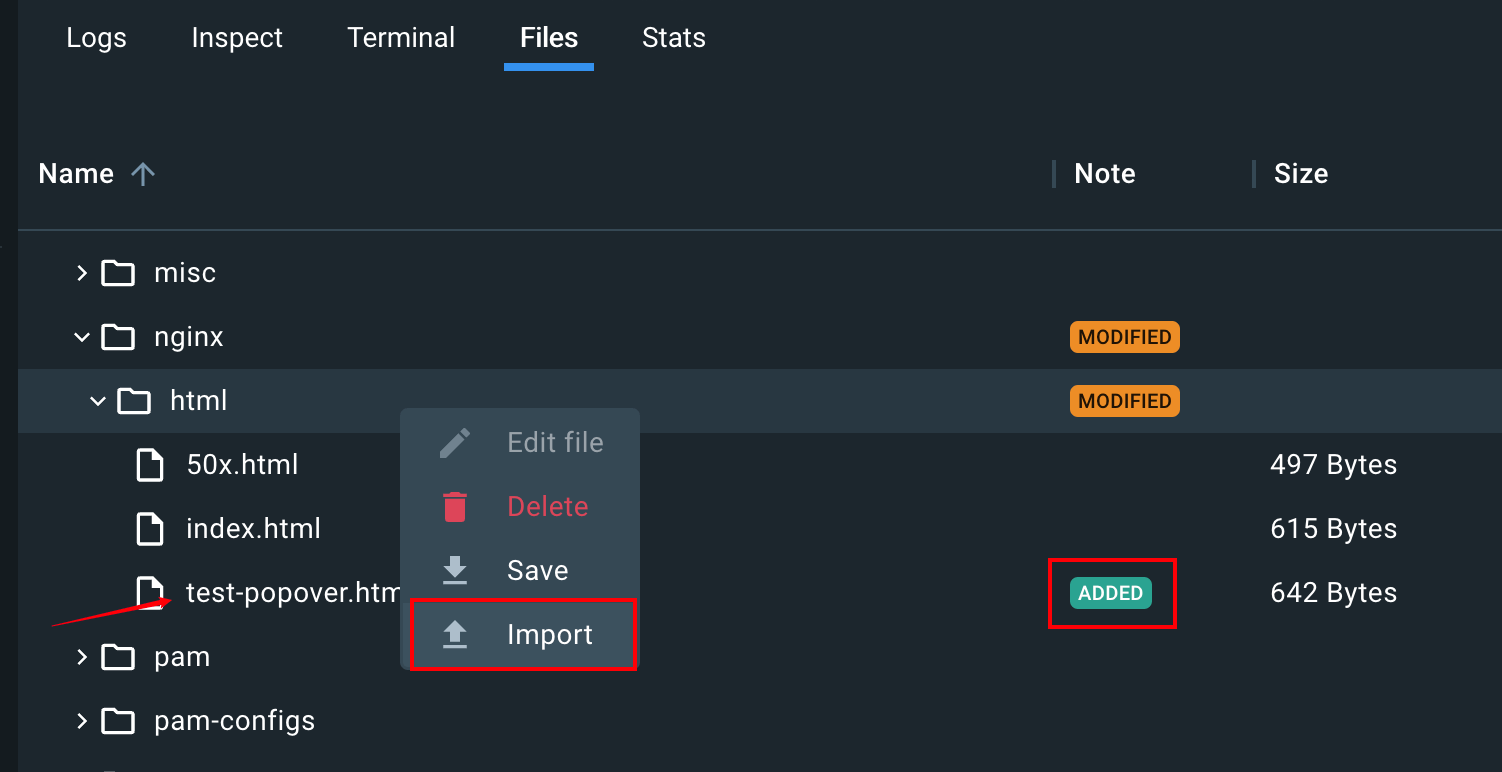
- 这里可以直接上传文件,当然也可以采用
docker cp等命令 - 打开浏览器,访问对应的文件就能看到刚上传的文件是能正常访问的
nginx.conf
- 只要放到
/usr/share/nginx/html下的文件,都可以通过被访问到。 - 可是为什么呢?这是因为
nginx的默认配置。 - 我们看下
nginx配置文件 也就是/etc/nginx/nginx.conf - 把文件复制出来看看具体内容
sh
user  nginx;
worker_processes  auto;

error_log  /var/log/nginx/error.log notice;
pid        /var/run/nginx.pid;


events {
    worker_connections  1024;
}


http {
    include       /etc/nginx/mime.types;
    default_type  application/octet-stream;

    log_format  main  '$remote_addr - $remote_user [$time_local] "$request" '
                      '$status $body_bytes_sent "$http_referer" '
                      '"$http_user_agent" "$http_x_forwarded_for"';

    access_log  /var/log/nginx/access.log  main;

    sendfile        on;
    #tcp_nopush     on;

    keepalive_timeout  65;

    #gzip  on;

    include /etc/nginx/conf.d/*.conf;
}- 这个
nginx.conf叫做主配置文件,里面一般做一些全局的配置 比如错误日志的目录等等。 - 可以看到
http下面有个include引入了/etc/nginx/conf.d/*.conf的配置。 - 一般具体的路由配置都是在这些子配置文件里。
default.conf
- 打开 conf.d 目录,下面只有
default.conf这一个默认的配置文件 - 内容如下:
sh
server {
    listen       80;
    listen  [::]:80;
    server_name  localhost;

    #access_log  /var/log/nginx/host.access.log  main;

    location / {
        root   /usr/share/nginx/html;
        index  index.html index.htm;
    }

    #error_page  404              /404.html;

    # redirect server error pages to the static page /50x.html
    #
    error_page   500 502 503 504  /50x.html;
    location = /50x.html {
        root   /usr/share/nginx/html;
    }

    # proxy the PHP scripts to Apache listening on 127.0.0.1:80
    #
    #location ~ \.php$ {
    #    proxy_pass   http://127.0.0.1;
    #}

    # pass the PHP scripts to FastCGI server listening on 127.0.0.1:9000
    #
    #location ~ \.php$ {
    #    root           html;
    #    fastcgi_pass   127.0.0.1:9000;
    #    fastcgi_index  index.php;
    #    fastcgi_param  SCRIPT_FILENAME  /scripts$fastcgi_script_name;
    #    include        fastcgi_params;
    #}

    # deny access to .htaccess files, if Apache's document root
    # concurs with nginx's one
    #
    #location ~ /\.ht {
    #    deny  all;
    #}
}这里面配置了
localhost:80虚拟主机下的所有路由。虚拟主机是什么呢?
就是可以用一台
nginx服务器来为多个域名和端口的提供服务。只要多加几个
server配置就可以。这里我们就配置
localhost:80这一个虚拟主机。下面的
location就是路由配置。比如这个配置:
sh
location / {
	root   /usr/share/nginx/html;
	index  index.html index.htm;
}它就配置了
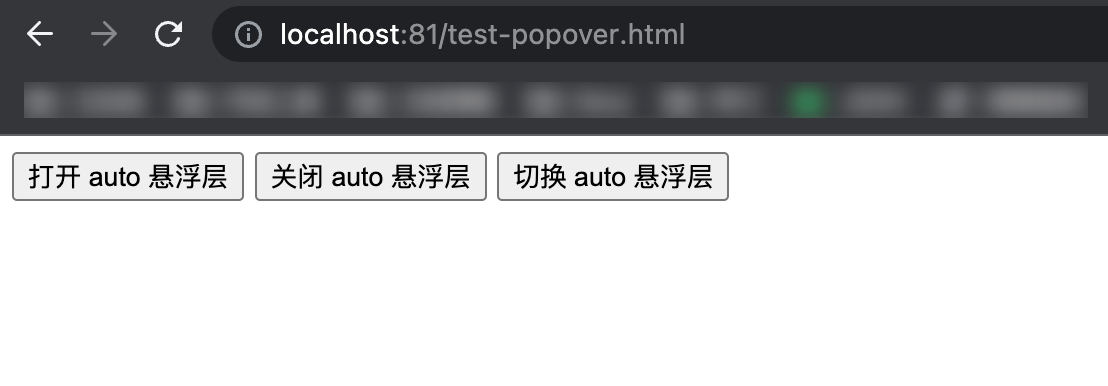
/下的所有路由,都是在root指定的目录查找。所以
http://localhost/test-popover.html就是从/usr/share/nginx/html/test-popover.html找的。location支持的语法有挺多,我们分别试一下在
default.conf中添加下面几个匹配规则
sh
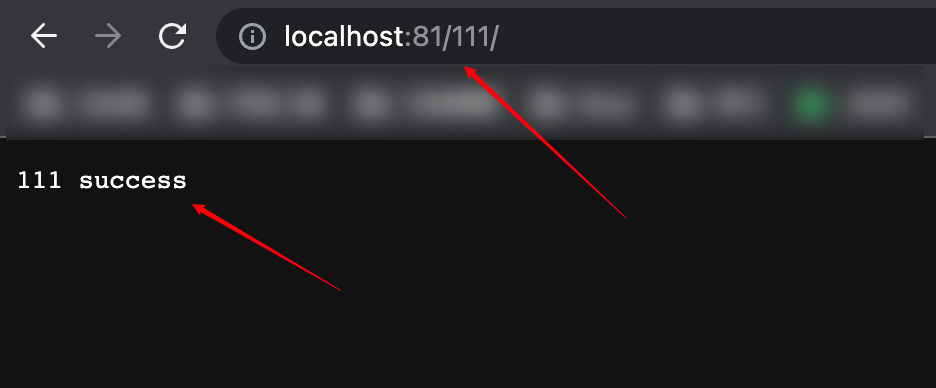
location = /111/ {
default_type text/plain;
return 200 "111 success";
}
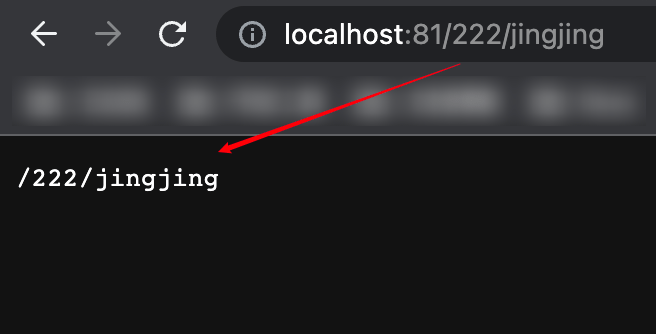
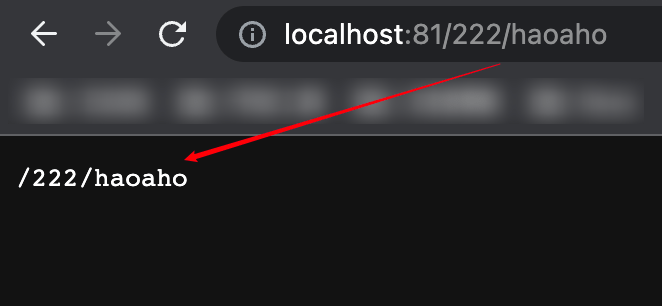
location /222 {
default_type text/plain;
return 200 $uri;
}
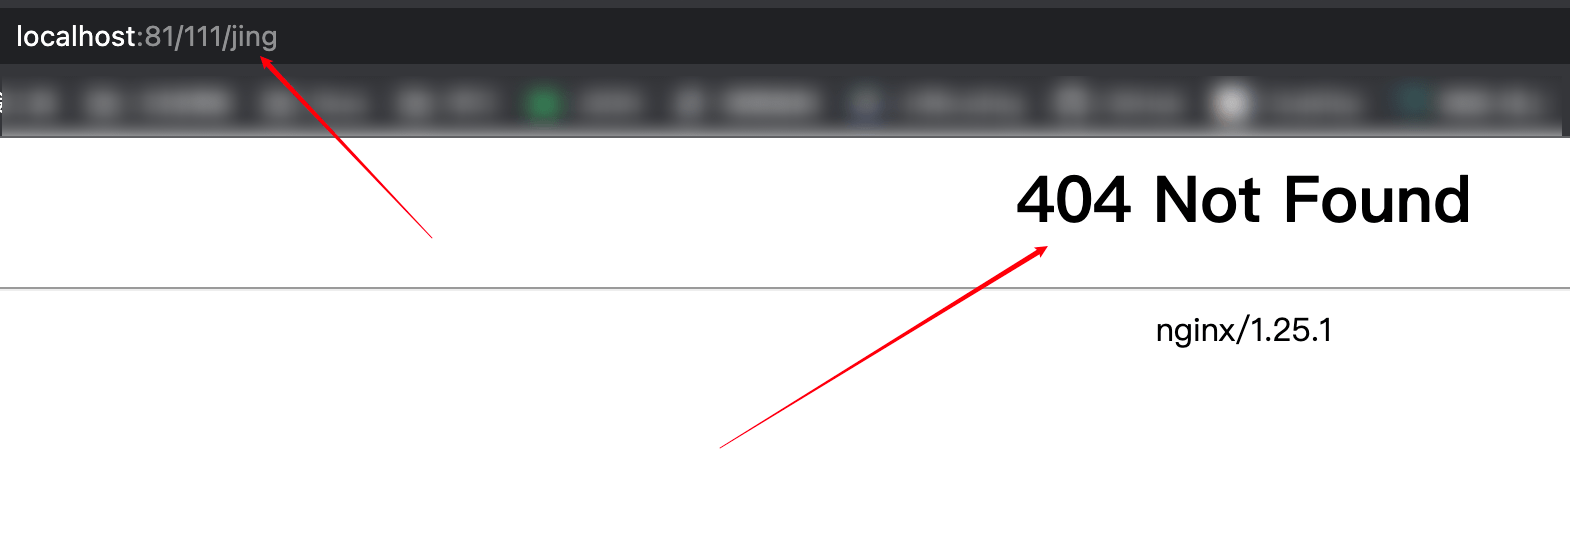
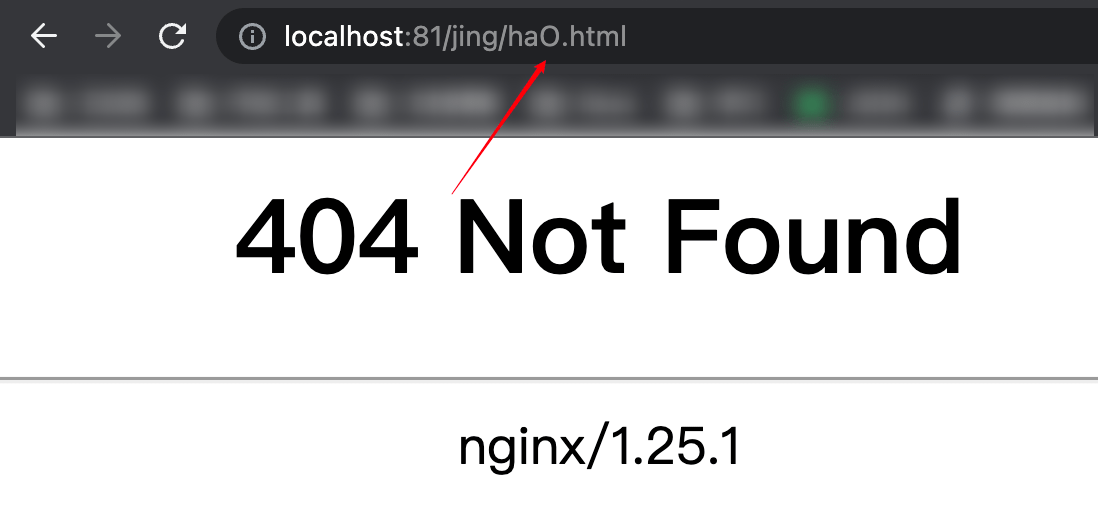
location ~ ^/jing/hao.*\.html$ {
default_type text/plain;
return 200 $uri;
}
location ~* ^/hao/Jing.*\.html$ {
default_type text/plain;
return 200 $uri;
}- 然后在容器内的 terminal 执行:
sh
nginx -s reload- 这命令是重新加载配置文件。
精确匹配
sh
location = /111/ {
    default_type text/plain;
    return 200 "111 success";
}location和路径之间加了个=,代表精准匹配- 也就是只有
url才会匹配这个路由。
前缀匹配
sh
location /222 {
    default_type text/plain;
    return 200 $uri;
}- 不带
=代表根据 ,后面可以是任意路径。 - 这里的
$uri是取 。
正则匹配[区分大小写]
sh
location ~ ^/jing/hao.*\.html$ {
    default_type text/plain;
    return 200 $uri;
}- 如果想支持正则匹配,就可以在
location后面加个~ - 这里的正则语法不难看懂,就是
/jing/hao开头,然后中间是任意字符,最后.html结尾的url
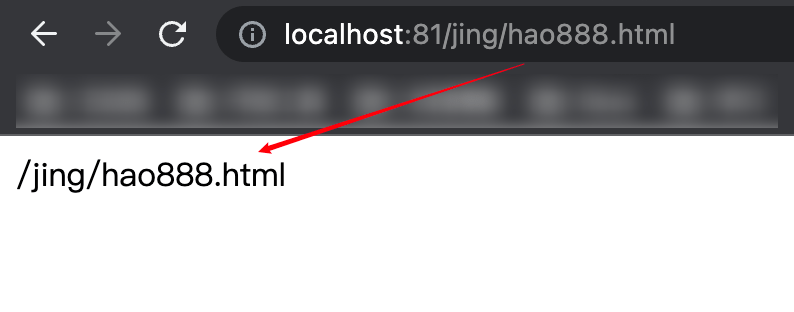
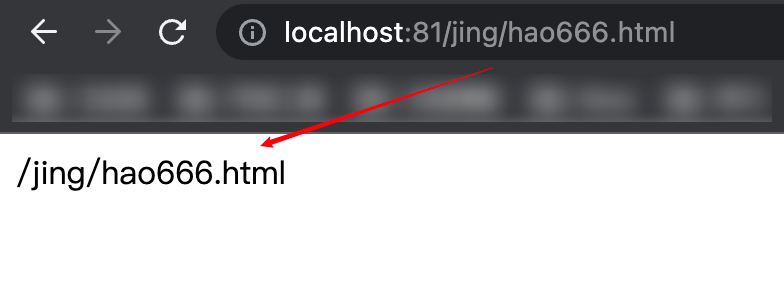
- 但是正则匹配是区分大小写的,比如这样访问就会 404
正则匹配[不区分大小写]
sh
location ~* ^/hao/Jing.*\.html$ {
    default_type text/plain;
    return 200 $uri;
}- 如果想让正则不区分大小写,可以再加个
*

优先级
- 在配置文件再加上这个配置,然后 reload 一下 nginx
sh
location /hao {
    default_type text/plain;
    return 200 'xxxx';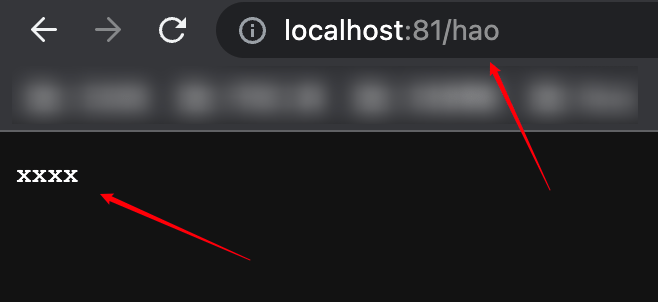
}- 现在配置文件中有两个以
/hao开头的匹配规则:~* ^/hao/Jing.*\.html$和/hao - 再次访问一个以
/hao开头的url,表现形式如下图:
- 如果想要提高
/hao匹配规则的优先级,需要在location的后面添加^~
sh
location ^~ /hao {
    default_type text/plain;
    return 200 'xxxx';
}- 修改一下 default.conf ,然后重启一下 nginx ,再次访问刚才的 url
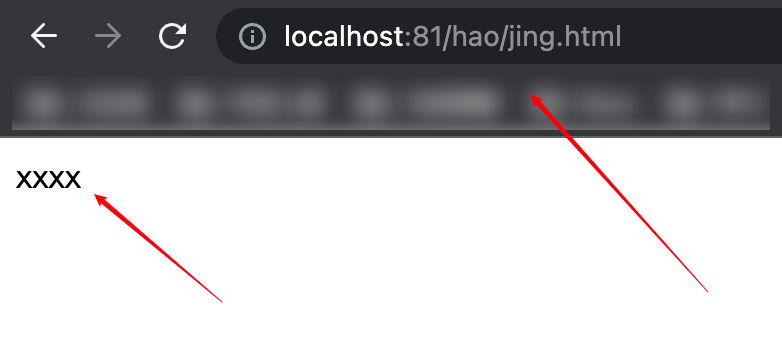
- 这次会发现优先匹配上了
/hao这个规则
location 配置总结
location
location = /aaa是精确匹配/aaa的路由。location /bbb是前缀匹配/bbb的路由。location ~ /ccc.*.html是正则匹配。可以再加个*表示不区分大小写location ~* /ccc.*.htmllocation ^~ /ddd是前缀匹配,但是优先级更高。这 4 种语法的优先级是这样的:
精确匹配 > 高优先级前缀匹配 > 正则匹配 > 普通前缀匹配
alias vs root
TIP
root和alias的区别就是root会把匹配条件的路径一并拼接到文件路径的alias不会。
举个例子
sh
location ^~ /hao {
    default_type text/plain;
    alias /usr/share/nginx/html;
}

location ^~ /hao {
    default_type text/plain;
    root /usr/share/nginx/html;
}alias
- 可以先这样改一下
default.conf配置文件
sh
location ^~ /hao {
    default_type text/plain;
    alias /usr/share/nginx/html;
}- 再上传两个文件到
/usr/share/nginx/html
INFO
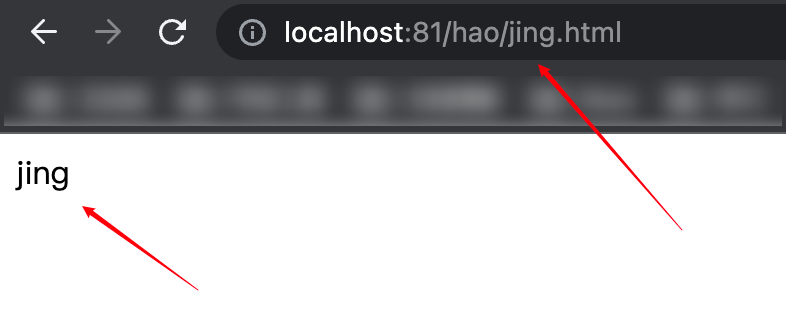
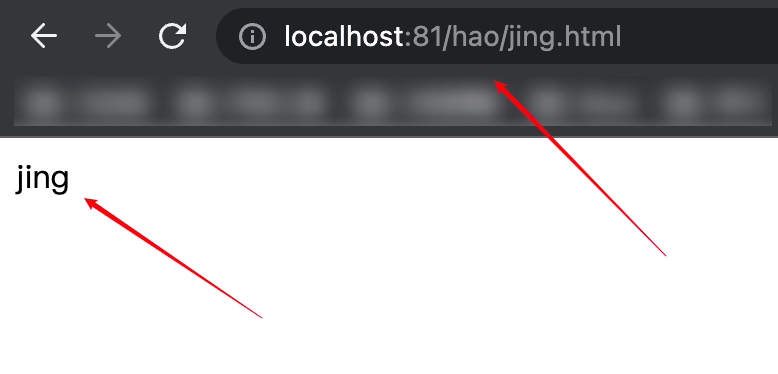
- 然后打开浏览器访问一下
http://localhost:81/hao/jing.html - 因为现在采用的是
alias,访问http://localhost:81/hao/jing.html去nginx中查文件的时候不会把前缀/hao加上 - 即访问的真实路径是 ,是能正常请求到内容的。
root
- 可以再这样改一下
default.conf配置文件
sh
location ^~ /hao {
    default_type text/plain;
    root /usr/share/nginx/html;
}INFO
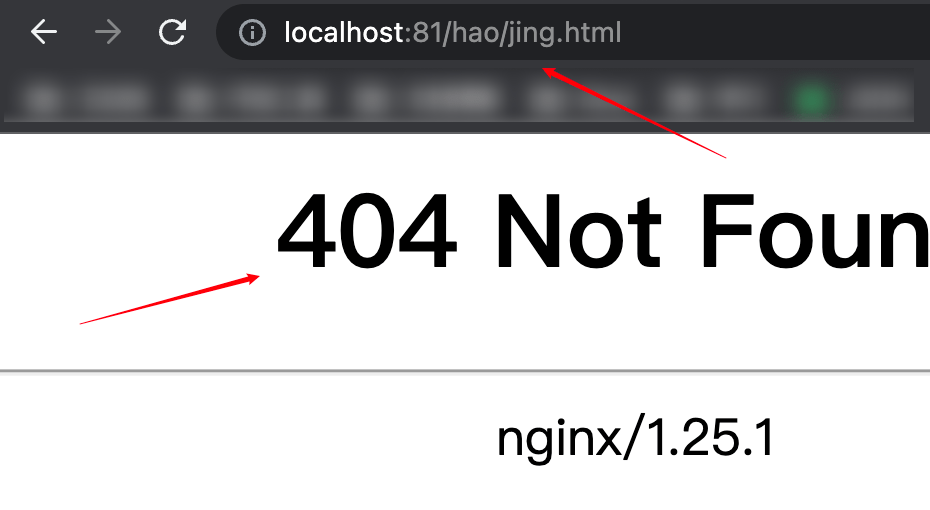
- 然后打开浏览器访问一下
http://localhost:81/hao/jing.html - 因为现在采用的是
root,访问http://localhost:81/hao/jing.html去nginx中查文件的时候会把前缀/hao加上 - 即访问的真实路径是
- 这个路径不存在,所以是不能正常请求到内容的,返回的是
404页面。
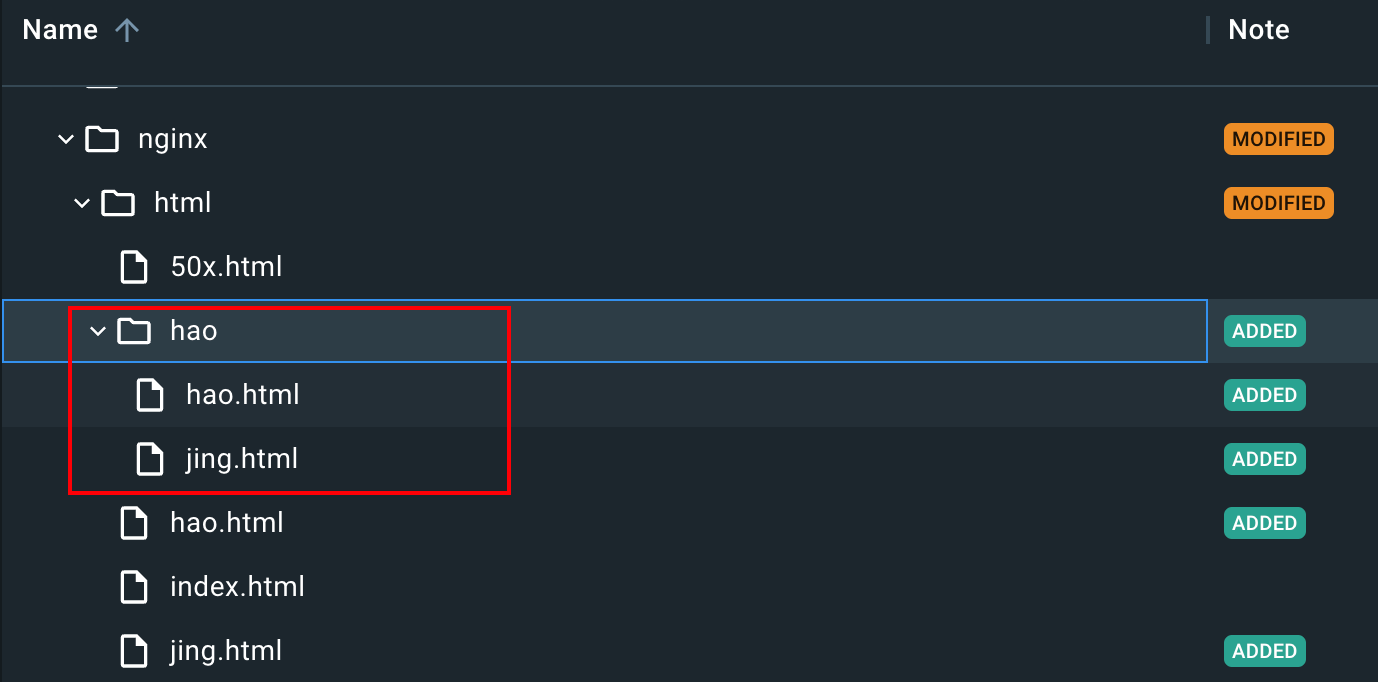
- 我们可以新建一个
hao文件夹,里面放同样的两个html文件,然后拷贝至容器中
- 终端重启一下
nginx,访问http://localhost:81/hao/jing.html - 结果发现没有成功返回对应的
html, 也没有404,而是提示403没有权限
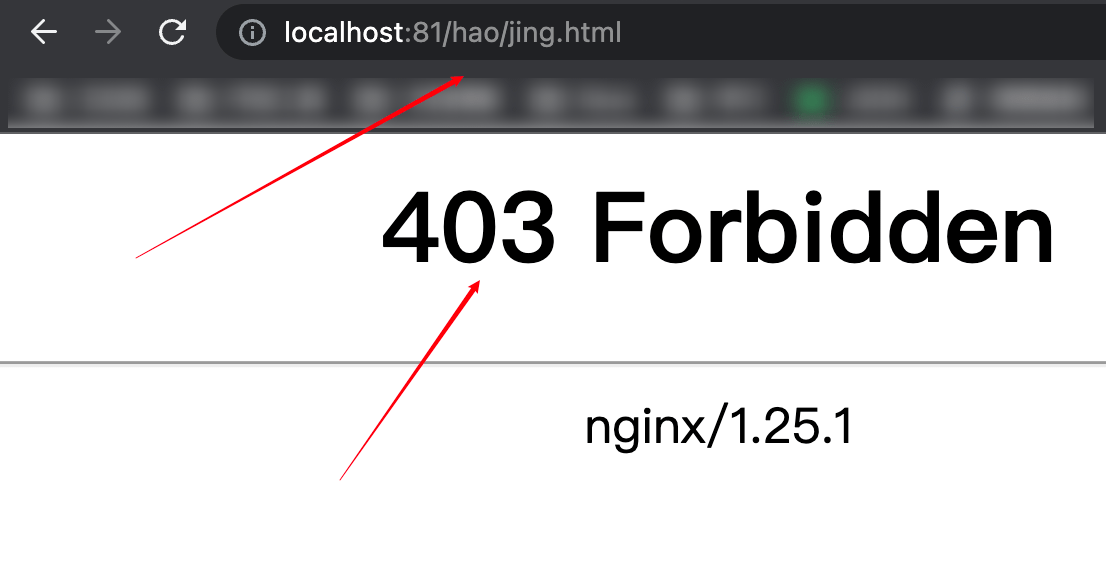
- 是因为
nginx默认的执行用户是nginx,上面nginx.conf里面第一行有写:user nginx; - 这里只需要把
user改成root就可以了 - 改完
nginx.conf重启nginx打开浏览器重新访问就能正常访问了